|
Threading is an art form creating clean lines with precision, while refining the appearance of the face. Threading is the answer for those who are looking for a natural, hygienic and relatively painless technique for removal of unwanted facial hairs. Threading just grabs the hair and pulls it out without irritating the SKIN. Most people find it much less painful than waxing. SKIN does not get as red and irritated. Threading practically eliminates any redness or swelling of the skin. It is anti-acne. Most people who break out from waxing do not experience this after threading. Threading is completely safe and even recommended by dermatologists. Hair does not need to be long, but just above the skin. The hairs have to be only above the skin to get threaded. Regrowth of hair is fine and smooth. The perfect arch. Threading is very precise, the result is a perfect brow with a tailored arch. Leaves skin smooth. The result of threading is a clean, silky no-mess look. Threading is a centuries old technique that has been commonly practiced in East Asia and the Middle East. By using a piece of thread, hair an be removed swiftly yet meticulously from the most delicate areas of the face. Facial Threading is the best alternative to waxing and tweezing, especially for sensitive SKIN.Unlike waxing, threading does not remove a layer of skin. Threading is by far the least invasive method of hair removal, leaving the skin clean and smooth.
By knotting the thread and creating a trap, hairs are caught and forced out by the root. The rapid back and forth movement removes hair very efficiently. Depending upon the client's needs, hair can be removed individually or a few at a time. Threading on the brows and lips lasts anywhere from 2 to 4 weeks. Facial hair on the sides lasts from 4 to 8 weeks. Would you like to have your brows threaded? click here to make an appointment and rates.
1 Comment
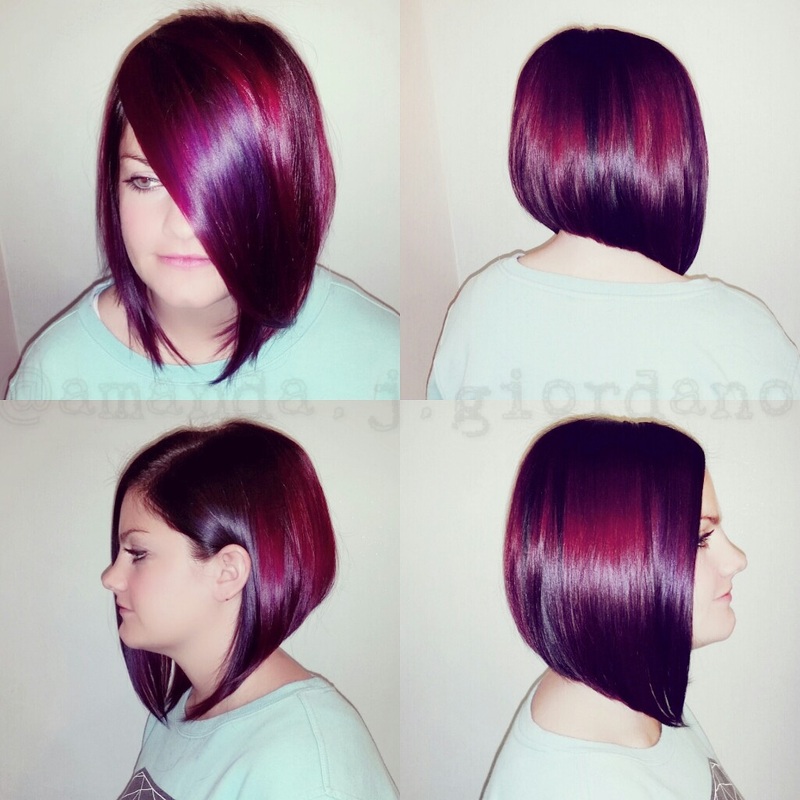 Plum Raspberry Sherbet
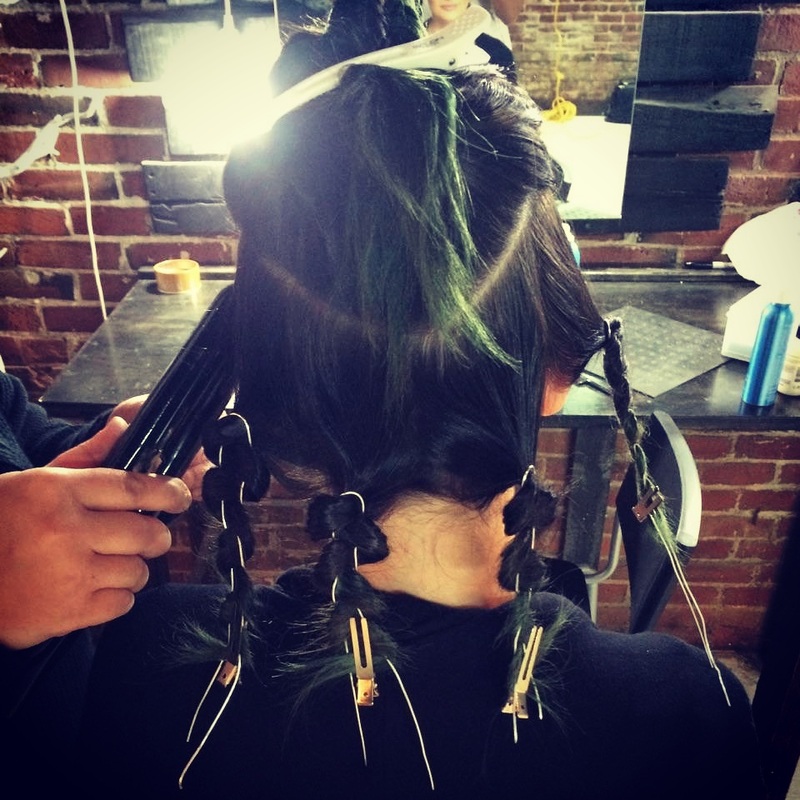
Natural level: 6 regrowth about half inch Existing artificial level: 2 with level 7,8 and 9 on the mid lengths and ends from previous violet ombre Formulas: prelightened with wella soft blonde:30vol:olaplex I choose soft blonde when doing fashion shades, since it's white you're able to see the true exposed underlying pigment, no surprises when you rinse, also I love it's creamy consistency especially mixed with olaplex, it doesn't dry out. Foundation/triangle/veil shade wella color touch 3/68 + /68:6vol Pravana violet + wild orchid Joico magenta + pink I choose to use 2 different brands for the fashion shades because I believe the Joico magenta and pink have a stronger amount of pigment and shine than pravana, but then I like the violet in pravana, because Joico violet is to blue, and I dilute it slightly with the wild orchid. Application steps: I first map out on the head where I want all my darker shade to be located, I clip away the veil, and 2 triangles these are going to be the foundation shade so there is no need to lighten them. Then I need to pre lighten the hair, in this particular situation I used a cotton and cellophane technique. Her ends are already at the desired level so I do not need to lift them, I paint my soft blonde in the mid area where the majority is a level 2, I stay about 1 to 2 inches away from the scalp. Using a medium/white bristle color track application brush (my favorite for any painting techniques ) I take 1 inch horizontal sections through the whole head and defusing the soft blonde as I get closer to the top. Once the hair has developed to our desired level we rinse and wash once with Kevin Murphy balancing wash. The hair is then blown dry. I mist Aloxxi colourprime on the hair for even porosity, consistent color development and smooth color application. I also apply Aloxxi barrier cream around hairline to prevent from staining. Then we apply the foundation shade on her regrowth area, next I foil out my veil and 2 triangles with the foundation shade, they're easy to find since they have not been lightened. The veil is a long rectangle shape about 1 to 2 fingers wide on top of her part, in this case she has a strong side part. I then move on to my triangles on the right, which is her heavier side, I placed the triangle above the ear where the curve of the head begins. Triangle point up. I move on to the left, I placed this triangle past the ear below the curve of the head. Now I use a zip and zag parting technique as I work through the head and foil 2 inch wide slices of the violet and wild orchid mixture. I choose to foil the violet because of it power, if the hair is porous, when you rinse, it can mix, change or overpower other less powerful shades. But of course all hair is different. Once all the foiling is complete we then apply the pink and magenta mixture to all the hair left out of the foils. Once color is ready to be rinsed, we rinse hair with cooler water, leaving all foils in, you want to make sure to make neat and tight foil packets so they're easy to work around and aren't slipping out. Then we remove foil by foil and rinsing each one simultaneously. After all rinsing is complete we towel dry hair and apply the olaplex masque leave in for 10 mins. Rinse well. And style. Processing time: wella soft blonde is developed for 30 to 45 mins. Once color has been completely applied it develops for 30mins a longer life for your color is a commitment to be aware of what you're doing to your hair constantly. Finding a shampoo and conditioner that you and your hair likes. Making friends with dry shampoo, my favorite Kevin Murphy fresh hair. Get the hairs cut that need to get cut!!! And of course the most amazing thing in our Industry right now Olaplex and the take home olaplex I believe helps the integrity, porosity and of course leads to long life colors. I also believe the water can be very damaging to our locks it has so many unknown minerals. So the less you wet the hair the better. All hair reacts differently but these are my beliefs. The inspiration for this look is definitely a mash up. My assistant Emily and I attended the BTC color cut and style this past Sept. We have been gradually trying all the techniques we discovered at the show. I have my BTC notebook close so I can reference it often. The veil on this color placement was inspired by Justin Isaac I really enjoyed his teaching technique he painted very visual pictures in my mind. He said he was raised by his mother, she was blind. Which lead him to the way he shares his knowledge. this was very inspiring and really helped me visualize in my mind exactly what he was saying it made so much sense. Other inspirations for this look was the haircut, which we recently cut shorter, and always the amazingly talented artists I am so lucky to work with. I believe the hair speaks to me and guides me to what I want to create, the girls at Salon NOVA always laugh at me because I always say just listen to the hair it will tell you. It's a true collaboration between stylist, client, and the canvas. My client Kelly (the one in the pictures) is always an inspiration, she loves to change up her look so I'm constantly looking at her head with a fresh eye, I love clients that come in and say well what do you want to do, and they're open to trying my suggestions. A little tweak here and there can go a long way, and make someone feel so amazing,important and beautiful that's my favorite part. This style was inspired by The BIG show Kevin Murphy held in New York a couple years ago. They did a set with large hair pins, and very small sections of hair,and then flat ironed each pin and left to cool. so I've tried a few different techniques. First I was on a hunt to find these large hair pins. i was having a lot of trouble finding them, so i thought I'll just buy some wire from AC Moore and create my own. I tried the wire technique in a photo shoot we did with Ryan Scott. It was an interesting out come. Picture posted below. then we tried using the flexi rods which are in this video. This technique is very fun and there are endless possibilities. I choose to set the hair after I had blown out the hair which gave it a softer look. I applied Kevin Murphy's smooth again to damp towel dried hair. Then I blew dry her hair with my Ergo paddle brush. I sectioned the hair into 4 quadrants and then broke those sections in half horizontally which is shown in the video above. I use 8 small flexi rods, spraying each section with Kevin Murphys Hair resort spray and wrapped the hair in a figure eight motion. after the hair had been completely set we put her under the dryer for 10 minutes. let cool for 5. Lastly we removed the fexi rods and reveled this beautiful triangular wave. Awesome!!! Model below: Rachel Carbrey Photographer: Ryan Scott Hair and Make up: Amanda Giordano 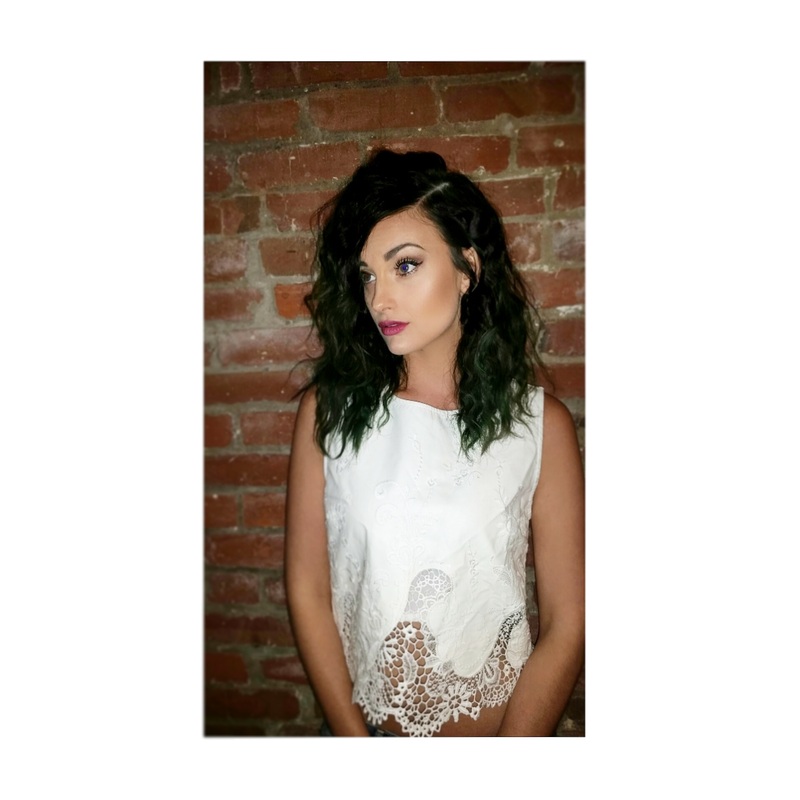 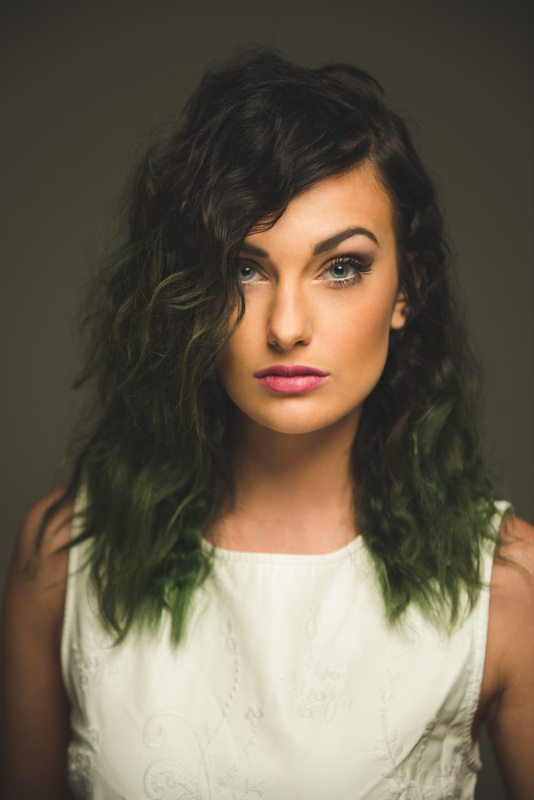 |
agFor the LOVE of hair and the beauty industry. creative hairdressing movement Archives
December 2016
Categories
All
|


 RSS Feed